

How to Light an Outdoor Patio for Ambiance: 7 Easy Steps
Table of Contents
- How to Light an Outdoor Patio for Ambiance: A Layered Plan
- Start With a Simple Sketch of Your Patio Zones
- Layered Outdoor Lighting: Ambient, Task, and Accent
- How to Hang Patio Lights Outside Without Damaging Your Space
- Outdoor String Lighting Ideas for Overhead Warmth
- The Best Lights for a Backyard: Lanterns, Path Lights, and More
- Brightness, Color Temperature, and Glare Control
- Power, Weatherproofing, and Low-Maintenance Setup
- Conclusion
- Frequently Asked Questions
Last Updated: October 13, 2026
How to Light an Outdoor Patio for Ambiance: A Layered Plan
Learning how to light an outdoor patio for ambiance comes down to one idea: layer your light. A single bright fixture flattens a space, while three or four soft sources at different heights create depth, warmth, and a reason to linger after dark.
The U.S. Department of Energy's outdoor lighting guidance makes a simple point: the right light level matters as much as the fixture itself. Too much light kills the mood. Too little makes steps and tables hard to see.
Start With a Simple Sketch of Your Patio Zones
Before you buy a single light, sketch your patio on paper. Mark where people sit, eat, walk, and gather, then mark where the light will come from.
Most patios have four zones, and each one has a placement rule:
- Dining area - the table where guests linger longest
- Seating area - chairs, sofas, or a fire pit circle
- Path or steps - anywhere someone walks after dark
Where to place each layer
Overhead ambient. Run the strand or pendants directly over the seating and dining footprints, not the whole patio.
Task light at the edges. Put path and step lights on the patio's outer boundary, aimed inward and down.
Accent light at the perimeter. Uplights go at the base of trees, walls, or columns, aimed up.
Portable light where people gather. Lanterns and table lamps go on tables and the ground near seating, filling gaps the fixed layers miss.
Three layout examples
Small patio (roughly 8x10 feet). One strand zigzagged overhead, two lanterns on the table, one path light at the entry. Skip uplights; there is not enough distance for the beam to read.
Large entertaining patio (roughly 20x30 feet or more). Two or three overhead runs to cover dining and lounge separately, path lights along the full boundary, uplights on two or three features, a low-voltage transformer for zoned dimming, and portable lanterns.
Mark your power sources on the sketch too
Before committing to a layout, note where your outlets are. Solar fixtures can go anywhere, but plug-in strands need to reach an outlet and low-voltage systems need a transformer within cable distance of every fixture.
Layered Outdoor Lighting: Ambient, Task, and Accent
Layered outdoor lighting combines three light types so no single source does all the work. Ambient sets the overall glow, task makes activities easy, and accent adds drama and depth.
Here is how the three layers break down:
| Layer | Purpose | Typical Fixtures | Placement |
|---|---|---|---|
| Ambient | Overall soft glow | String lights, overhead pendants | Above seating and dining |
| Task | Safe visibility | Path lights, step lights, table lamps | Walkways, stairs, tables |
| Accent | Drama and depth | Uplights, lanterns, spotlights | Trees, walls, focal points |
Start with ambient, then task, then accent. Skipping straight to accent is a common mistake: you end up with a dramatic patio that is still hard to eat dinner on.
How to Hang Patio Lights Outside Without Damaging Your Space
Learning how to hang patio lights outside starts with one rule: never staple, nail, or screw into a surface you cannot easily repair. Use clips, hooks, and tension wire.
A simple method that works on most patios:
- Measure the span between your anchor points
- Choose a wire or cable rated for outdoor use
- Attach screw-in hooks to posts, pergola beams, or fence caps
- Run a tension wire between the hooks
- Clip the light strand to the wire with small carabiners or zip ties
- Leave a little slack so wind and rain do not snap the strand
This keeps lights off the surface, no rust rings on your pergola, no holes in your siding, and makes seasonal takedown quick. If you rent, use adhesive hooks rated for outdoor use and check them after the first rain.
Outdoor String Lighting Ideas for Overhead Warmth
Outdoor string lighting ideas work best when the strand follows a shape, not a straight line.
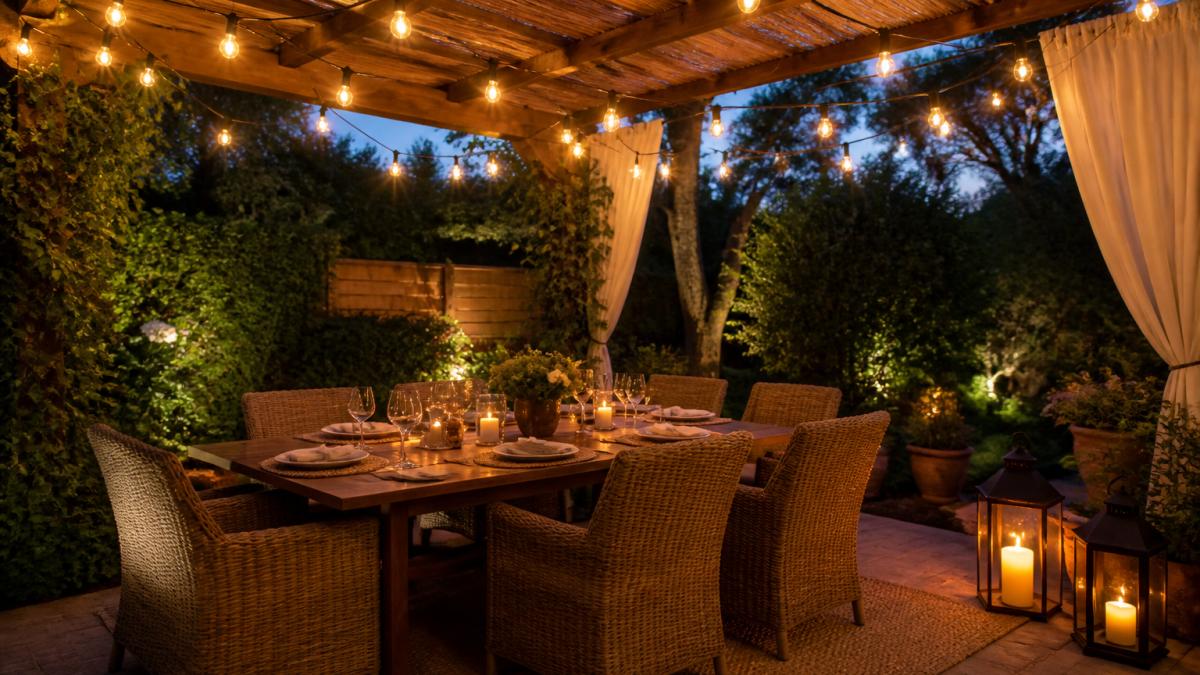
Warm white bulbs in the 2700K range give the cozy glow most people picture for patio ambiance; cool white looks harsh and clinical outdoors.
Hang strands roughly 8 to 10 feet above the ground, lower and tall guests duck, higher and the light spreads too thin to feel warm.
The Best Lights for a Backyard: Lanterns, Path Lights, and More
The best lights for a backyard match each zone's job. Lanterns bring portable warmth, path lights keep walkways safe, and uplights add drama to trees and walls.
Outdoor Lanterns for Porch, 13.2" Led Flickering Flameless Candle Lantern →
Lanterns are the easiest layer to add because they need no wiring.
- Outdoor lanterns for porch and patio use a solar panel and a flickering LED that mimics a real candle. They run 8 to 10 hours on a full charge and carry an IP44 waterproof rating.
- Solar floor lamps bring 3000K light at 450 lumens with a remote for dimming and timers. The IP54 stainless steel body handles rain and dust.
- Hanging solar lanterns clip onto branches, pergolas, or hooks with no tools. The IP65 shell resists rust and scratches.
For path lights, look for low-voltage or solar models with a downward shield. That keeps light on the ground and out of your neighbors' windows.

Brightness, Color Temperature, and Glare Control
Brightness and color temperature decide whether a patio feels cozy or like a parking lot. Pick a Kelvin value, a lumen target per zone, and a beam angle, then control glare at the source.
Color temperature: pick one Kelvin value and stay there
Color temperature is measured in Kelvin (K), and lower numbers are warmer. Keep the whole patio within one narrow band so nothing looks mismatched.
- 2200K-2400K - amber, candle-like. Best for accent uplights, lanterns, and fire-pit circles.
- 2700K - the standard warm white most people picture for patios. Good default for string lights and pendants.
- 3000K - slightly crisper warm white. Fine for task areas like grills and prep counters.
- 3500K and above - cool white. Reads clinical outdoors and washes out foliage. Avoid it.
A common mistake is mixing a 2700K strand with a 4000K path light, the path light looks blue and pulls the eye. Buy every fixture in the same band, or at most two adjacent bands.
Brightness: think in lumens per zone, not watts
Lumens measure light output; watts measure power draw, and with LEDs the two are no longer linked. Plan by zone:
| Zone | Target output | Notes |
|---|---|---|
| Ambient over seating | 400-800 lumens total, spread across the strand | More, dimmer sources beat one bright one |
| Dining table | 300-500 lumens directly over the table | Enough to see food, not enough to flatten faces |
| Path and step lights | 50-150 lumens per fixture | Low and downward-facing |
| Accent uplights | 100-300 lumens per fixture | Narrow beam, aimed up |
| Lanterns and table lamps | 100-450 lumens | Portable, so you can move them |
If your fixtures are dimmable, buy roughly 1.5x to 2x the lumens you want and dim down. Dimming an LED shifts it warmer on good fixtures and gives headroom for a bright task moment before dropping back to mood level.
Beam spread and glare: the part most guides skip
Glare is light hitting the eye directly instead of the surface you want lit. It is the fastest way to ruin patio ambiance, and it is almost always a placement problem, not a brightness problem.
- Beam angle - a narrow 15-30 degree beam throws a tight pool of light (good for uplighting a tree). A wide 60-120 degree beam floods an area (good for a path or a wall wash). Match the beam to the job; a narrow beam on a path leaves dark gaps, a wide beam on a tree just lights the trunk.
- Shield the source - any fixture where you can see the bare LED or bulb from a seated position will glare. Look for fixtures with a hood, louver, or recessed lens.
- Aim below eye level - seated eye height on a patio is roughly 40-48 inches. Keep bright sources above that aimed down, or below it aimed at the ground, never straight across at seated guests.
- Watch reflective surfaces - glass tables, polished stone, and water features bounce light back at eye level. Test at night before committing.
Dimming: control every layer separately
Put each layer on its own dimmer or remote so you can shift the mood as the evening goes:
- Arrival and dinner - ambient at 60-70 percent, task at full, accent at 40 percent
- After-dinner conversation - ambient at 30-40 percent, task off or low, accent at 60 percent for drama
- Late night - ambient at 10-20 percent, accent only
A single dimmer forces you to either over-light the seating or under-light the steps. Separate control is what makes a lit patio feel intentional.
Power, Weatherproofing, and Low-Maintenance Setup
Power and weatherproofing decide how much work your patio lighting becomes. Solar fixtures need no wiring; low-voltage systems need a transformer and buried cable but run on safe, low current.
For any corded setup, follow the UL Solutions guidance on outdoor electrical products and use fixtures and cords rated for wet locations.
A quick weatherproofing checklist:
- Confirm an IP rating of IP44 or higher for exposed fixtures
- Use outdoor-rated extension cords, never indoor ones
- Seal every connection with a waterproof cap
- Mount transformers off the ground
Maintenance is mostly seasonal. Wipe solar panels monthly so they keep charging, replace rechargeable batteries every year or two, and bring fabric shades and non-solar strands inside before the first hard freeze.
Conclusion
The hardest part of patio lighting is not picking fixtures. It is resisting the urge to over-light. Warm, layered, dimmable light beats a single bright source every time.
Spirit of Willow curates outdoor pieces built to hold up season after season, from solar lanterns to floor lamps with remote dimming.

Start with one layer, add the next when ready, and let the space tell you what it needs.
Frequently Asked Questions
How do you hang patio lights outside without an electrician?
You can hang patio lights outside without hiring an electrician by choosing solar or battery-powered options. Solar lanterns charge during the day and turn on automatically at dusk, so no wiring is needed. For string lights, use adhesive hooks, cup hooks, or zip ties along a pergola, fence, or roofline. Keep cords away from standing water and check that any plug-in lights carry a weatherproof rating before use.
What are the best lights to illuminate a backyard for ambiance?
The best lights for a backyard combine three layers: ambient light for overall glow, task lighting for dining and seating areas, and accent lighting for plants and architectural features. Solar lanterns, string lights, and path lights work well together. Look for warm white bulbs around 2700K to 3000K, dimmable options, and IP44 or higher weatherproof ratings so your setup holds up through rain and fog.
How can you make patio lighting feel cozy instead of too bright?
Cozy patio lighting comes from layering low-output sources rather than relying on one bright fixture. Use warm white bulbs, add dimmer switches or remote-controlled brightness, and place lights below eye level where possible. Diffused light from lanterns and string lights creates a soft glow, while flood lighting aimed at walls or plants adds depth without glare. Avoid cool white bulbs, which read as harsh outdoors.
Where should you place lights on an outdoor patio?
Place lights in three zones: overhead for ambient glow, at table and seating height for tasks, and along the ground or in plant beds for accent. Hang string lights above the main gathering area, set lanterns on side tables or the patio floor, and use path lights along walkways and steps for safety. Keep bright fixtures away from seating eye level to reduce glare and keep the mood relaxed.